
Mastering EQ: The Beginner's Guide to EQ'ing a Snare Drum

Welcome back to HomeRecordingMadeEasy.com! If you're here, you're probably looking to sharpen your EQ skills as part of your ongoing journey into music mixing. Today, we're tackling a crucial component in any rock track: the snare drum. Whether you're an aspiring audio engineer or a home studio enthusiast, understanding how to EQ a snare can make a world of difference in your mixes.
Why Focus on the Snare Drum?
In any rock track, the snare drum plays a pivotal role. It's the backbone of your rhythm section, so getting it to sound just right is vital. But before we dive into the specifics, let’s recap what we covered previously. If you missed our last session on EQing a kick drum, don’t worry — the link is in the description below.
Preparatory Steps
Listen Before You EQ
When it comes to mixing, one of the most common mistakes beginners make is jumping straight into applying EQ plugins. We often rush to add our favorite tools without pausing to ask ourselves what the track truly needs. Remember: always listen to your tracks in the context of the full mix before you start tweaking. Focus on what you like and dislike about the snare sound. Do you like its punch? Does it sit well with the rest of the drums?
"Tip number one is that before we even pull a plugin out, listen in the context of a mix."
Tools of the Trade
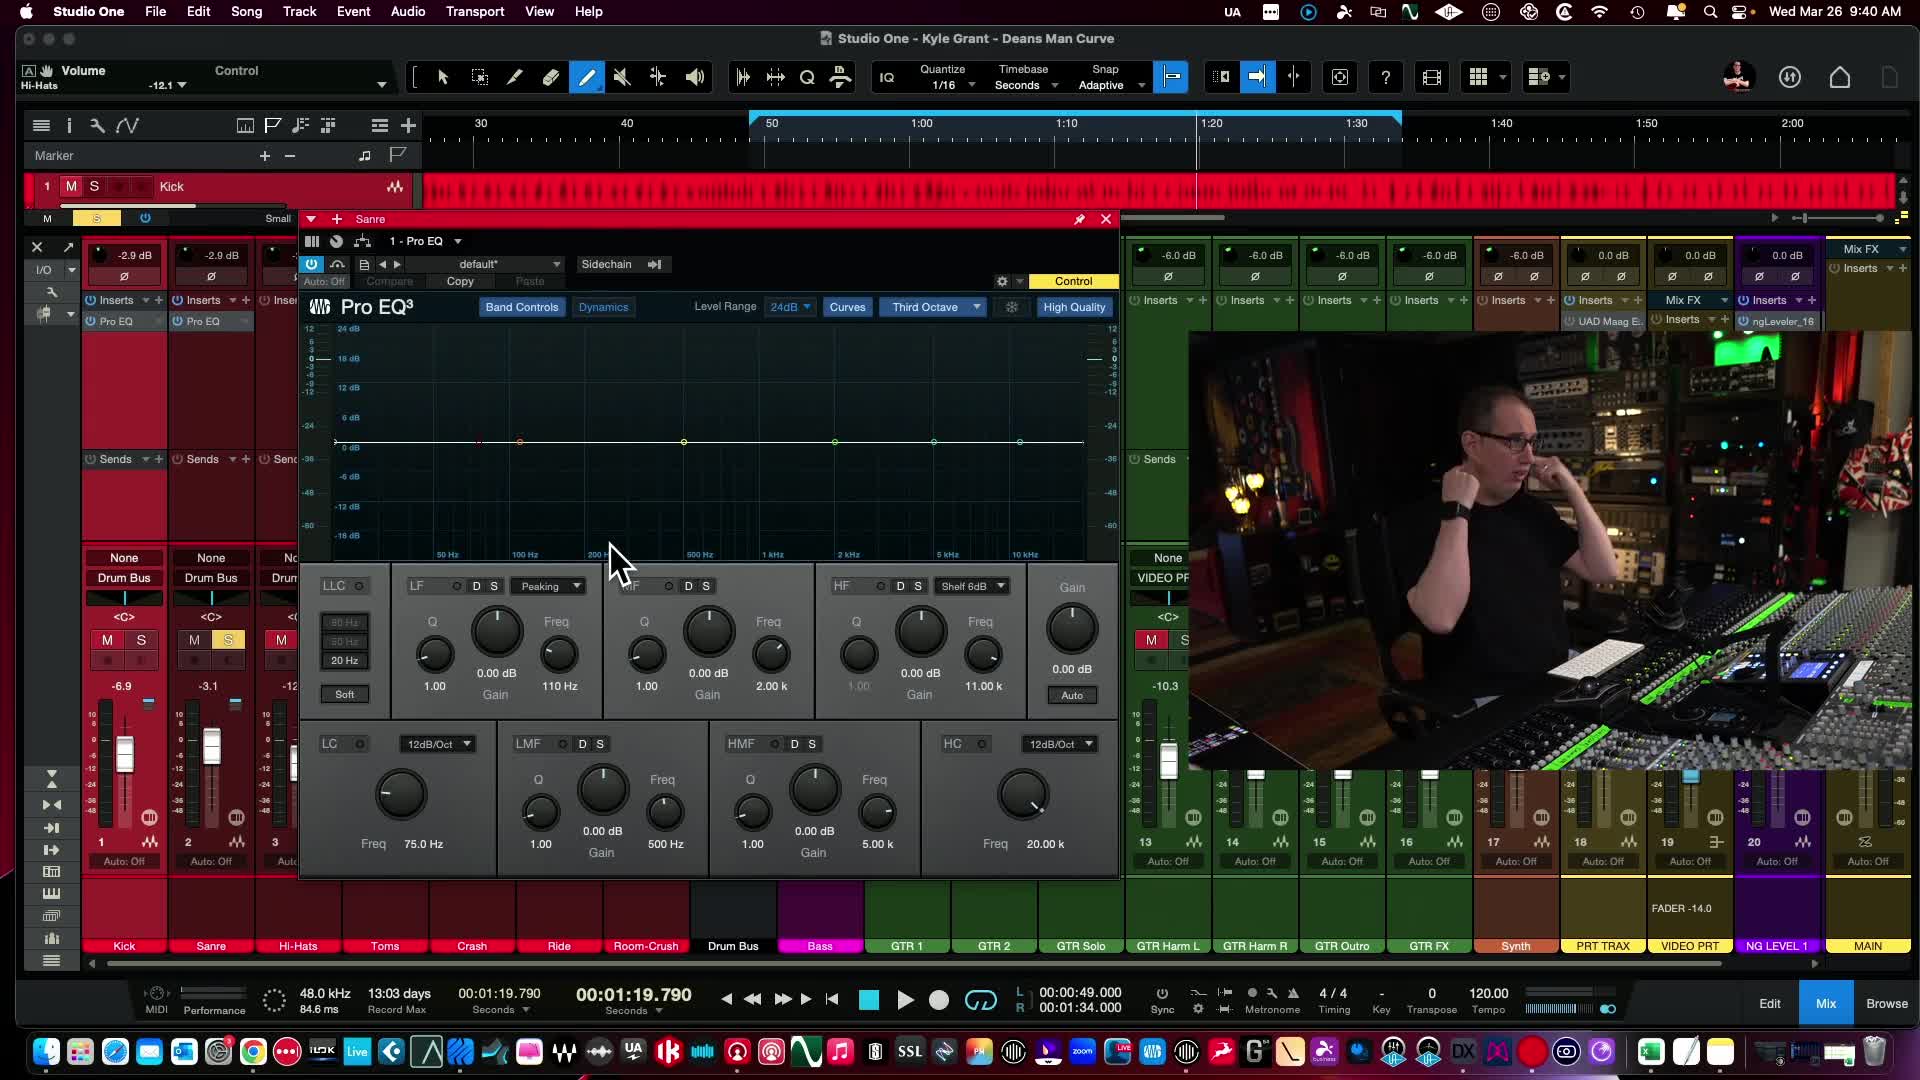
We're using Studio One's stock EQ for today's demonstration, but feel free to use any EQ you have on hand. If you're new, I recommend using an EQ with a graphic display as it offers a visual guide to frequencies, making it easier to understand the adjustments you're making.
Step-by-Step EQ Process for Snare Drum
Here's a detailed breakdown of the EQ moves that will transform your snare drum:
1. Apply a Low Cut Filter
Begin by applying a low cut filter to clear any unnecessary low-end rumble:
-
Frequency range: 70Hz to 90Hz
-
Slope: 24 dB/octave
Even though many of the unwanted frequencies might already be rolled off during recording, this step is crucial for live-recorded snare drums where low-end build-up can become problematic.
**Pro Tip:** Start by raising the low cut frequency until the snare sounds thin. Once you hit that point, back it off slightly.2. Boost the Bottom End for Weight
Snare drums in rock tracks often need extra weight to hold their ground:
-
Frequency range: 150Hz to 250Hz
-
Technique: Increase gain using a gentle Q value and listen for the desired thickness
3. Cut the Nasal Frequencies
To avoid that cardboard-like or boxy sound, identify and reduce mid-range honk:
-
Frequency range: 400Hz to 500Hz
-
Technique: Sweep the frequencies and notch out the offending frequency with a narrow Q
4. Enhance the High-End for Crack
To give your snare that iconic cut-through-the-mix quality:
-
Frequency range: 3kHz to 5kHz
-
Technique: Boost these frequencies to make your snare pop
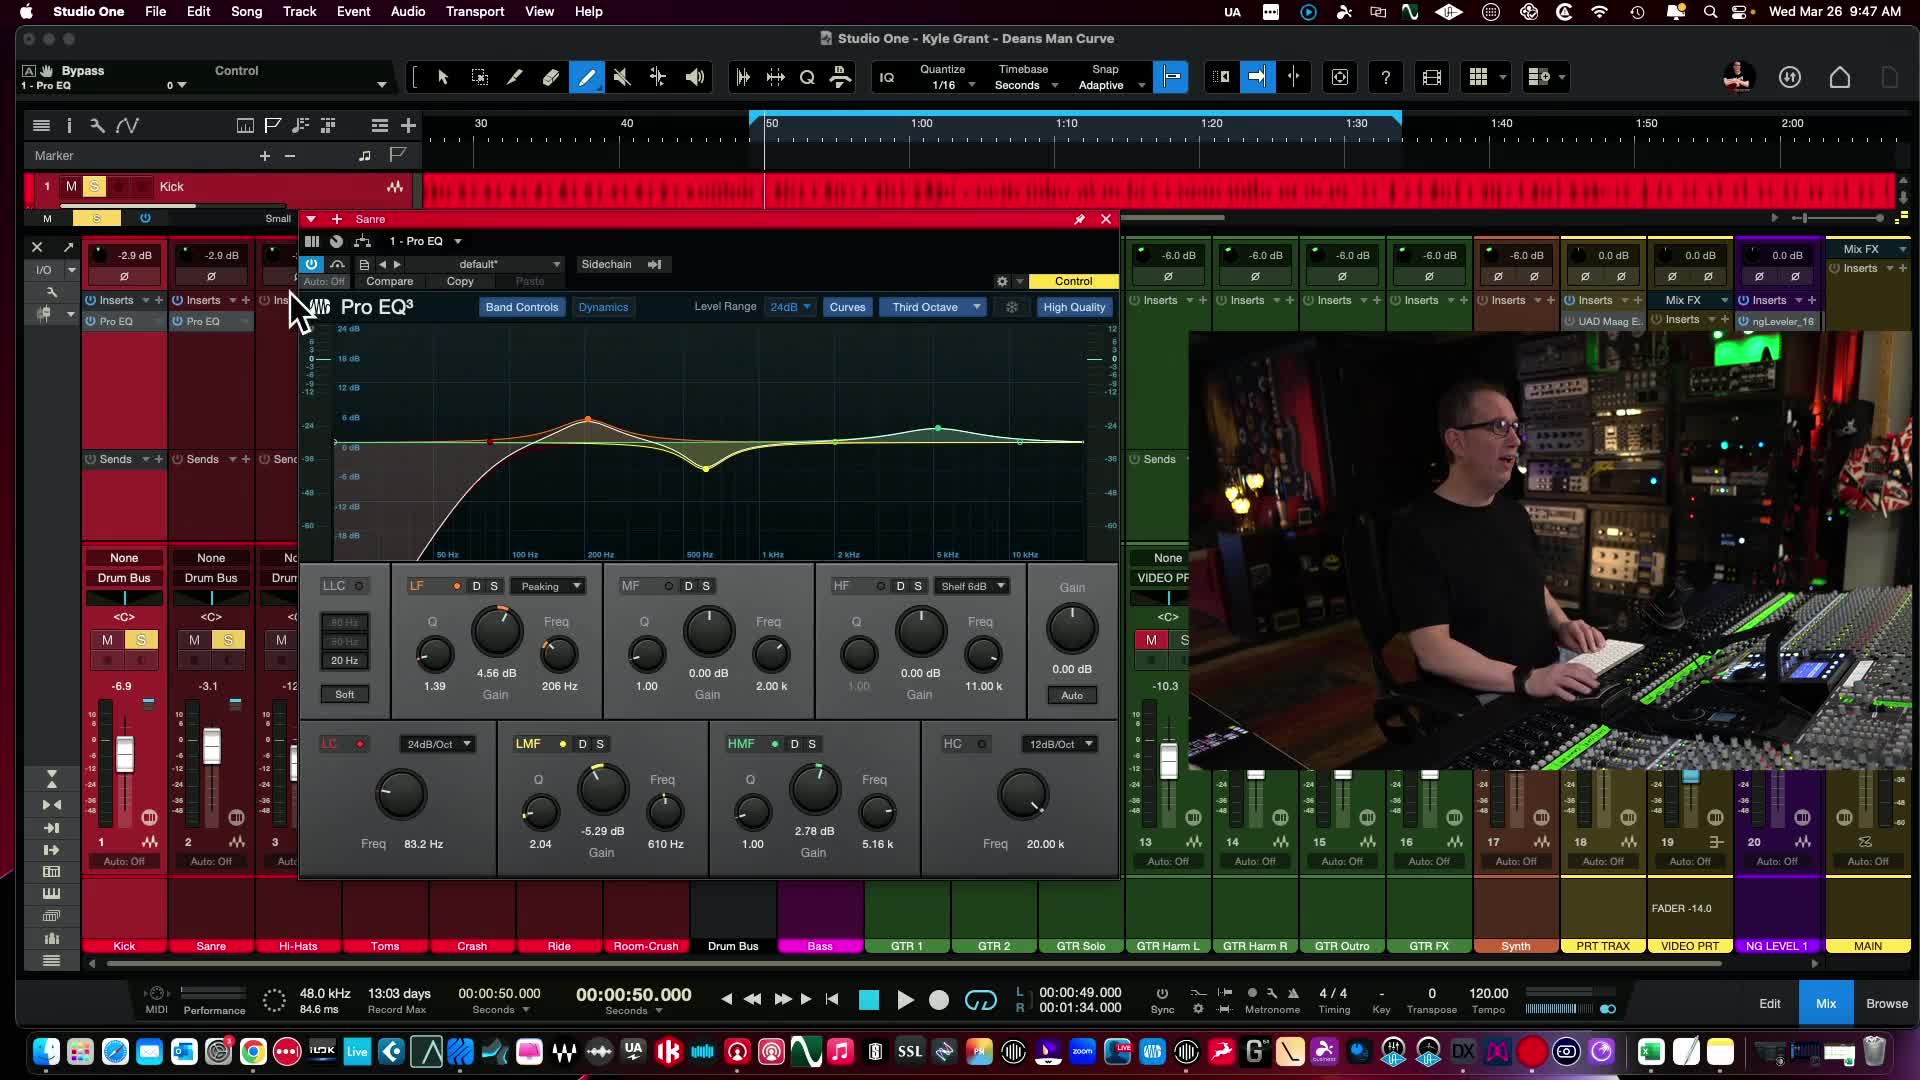
Here's what our adjusted EQ might look like:
[\text{Low Cut: } \sim 80\text{Hz}, \quad \text{Boost: } 200\text{Hz}, \quad \text{Cut: } 600\text{Hz}, \quad \text{Boost: } 5kHz]
5. Fine-Tune in Context of the Mix
After making initial adjustments in solo, recheck your EQ in the full mix context. Make minor tweaks to ensure it blends seamlessly with other elements.
Advanced Tweaks
Once you feel comfortable with these basics, you can explore advanced techniques like:
-
Sample Layering: Blend different samples for a unique snare character.
-
Compression: Tame dynamic peaks for a consistent snare attack.
-
Saturation: Add warmth and color for an analog feel.
If you are interested in more advanced techniques, drop a comment below, and I'll create a tutorial for you!
Conclusion
And there you have it! EQing a snare drum doesn't have to be daunting. By following these steps and using your ears as the ultimate guide, you'll be well on your way to achieving a professional, punchy snare sound.
Before you go, remember to grab your free mixing course on HomeRecordingMadeEasy.com — it’s our gift to you! If you're ready to dive deeper, check out our "EQ Made Easy" course. And just for being a diligent reader, use the coupon code YOUTUBE25 for a 25% discount.
Thank you for joining me today. Stay tuned for more insights on making your mixes stand out. Keep experimenting, and see you next time!

