
Mixing SSL Native Plugins: Part 4 – Adding Reverb, Delay, and Final Balancing
Welcome back, folks! If you’ve been following along, this is the grand finale—Part 4 of our 4-part series on mixing a song from scratch using the SSL Native bundle. If you’ve missed any previous parts, check out the links in the description below; you don’t want to miss out on all the steps that led us here.
In today’s post, we’re diving into the final touches that make a mix come alive: effects like reverb and delay, and the all-important final balancing with the help of a reference track. We’ll go behind the scenes on how to choose and tweak effects, walk through specific plugin settings, and show you how critical listening with references can take your mixes from good to great.
Whether you’re a seasoned audio pro or just starting out, this article is packed with actionable tips, plugin walk-throughs, and philosophy from the front lines of mixing.
Table of Contents
Introduction: Wrapping it Up with Effects
Hey again, guys! Here we are—Part Four of our walkthrough mixing an entire song with the SSL Native Plugins. Today, it’s all about those last steps that bring a mix to life: adding the right effects, using a reference track, and finding that sweet spot with our final fader ride.
If you liked this series, drop a comment below and let me know what plugins you’d like to see featured next. I’m thinking Universal Audio, or maybe some other cool bundles. Your input matters—so hit that comment section, and don’t forget to like, share, and subscribe. Stick with me to the end because I’ve got a freebie for you.
Setting the Stage: Where We Left Off
Before diving into effects, let’s get our bearings. Up to this point, we’ve:
-
Tracked and prepped the mix
-
Dialed in EQ, compression, gating, and more
-
Built the energy!
Now, everything sounds clean, punchy, and tight—but it’s bone dry. If you’re following along, you’ll know we’re working with “Imaginary Fears” by the talented James D. Cooler, and up till now it’s been all about the dry tracks.
Let’s hear a quick snippet—just dry tracks, no reverb, no delay, nothing:
“That’s kind of our final mix here, blending it in. I was bouncing between the reference track and our track... the reference has a lot of reverb, probably more than I’d like, but ours is bone dry.”
Caption: The mix window with all effects bypassed, ready for final FX steps.
Choosing and Using Reverbs (SSL Native FlexVerb)
The Challenge: Fresh Ears with New Tools
Honestly, I’m not super familiar with the reverbs and delays bundled with SSL Native. There aren’t a ton of choices, and they aren’t really the "set it and forget it" kind of plugins. Still, for this series, we’re going all in—only SSL Native plugins allowed!
Step 1: Drum Reverb
First up—drums. I usually lean on the overheads and room mics to give me space, but the reference track had a LOT of reverb (probably too much, in my opinion), and our drums were a touch dry and forward.
Solution:
I created a new Drum Verb effects track using the SSL FlexVerb.
-
Preset: Large Room (highly tweaked after loading)
-
Routing: Sending close mics (snare top/bottom, hi-hats, toms, overheads, front of kit) to FlexVerb
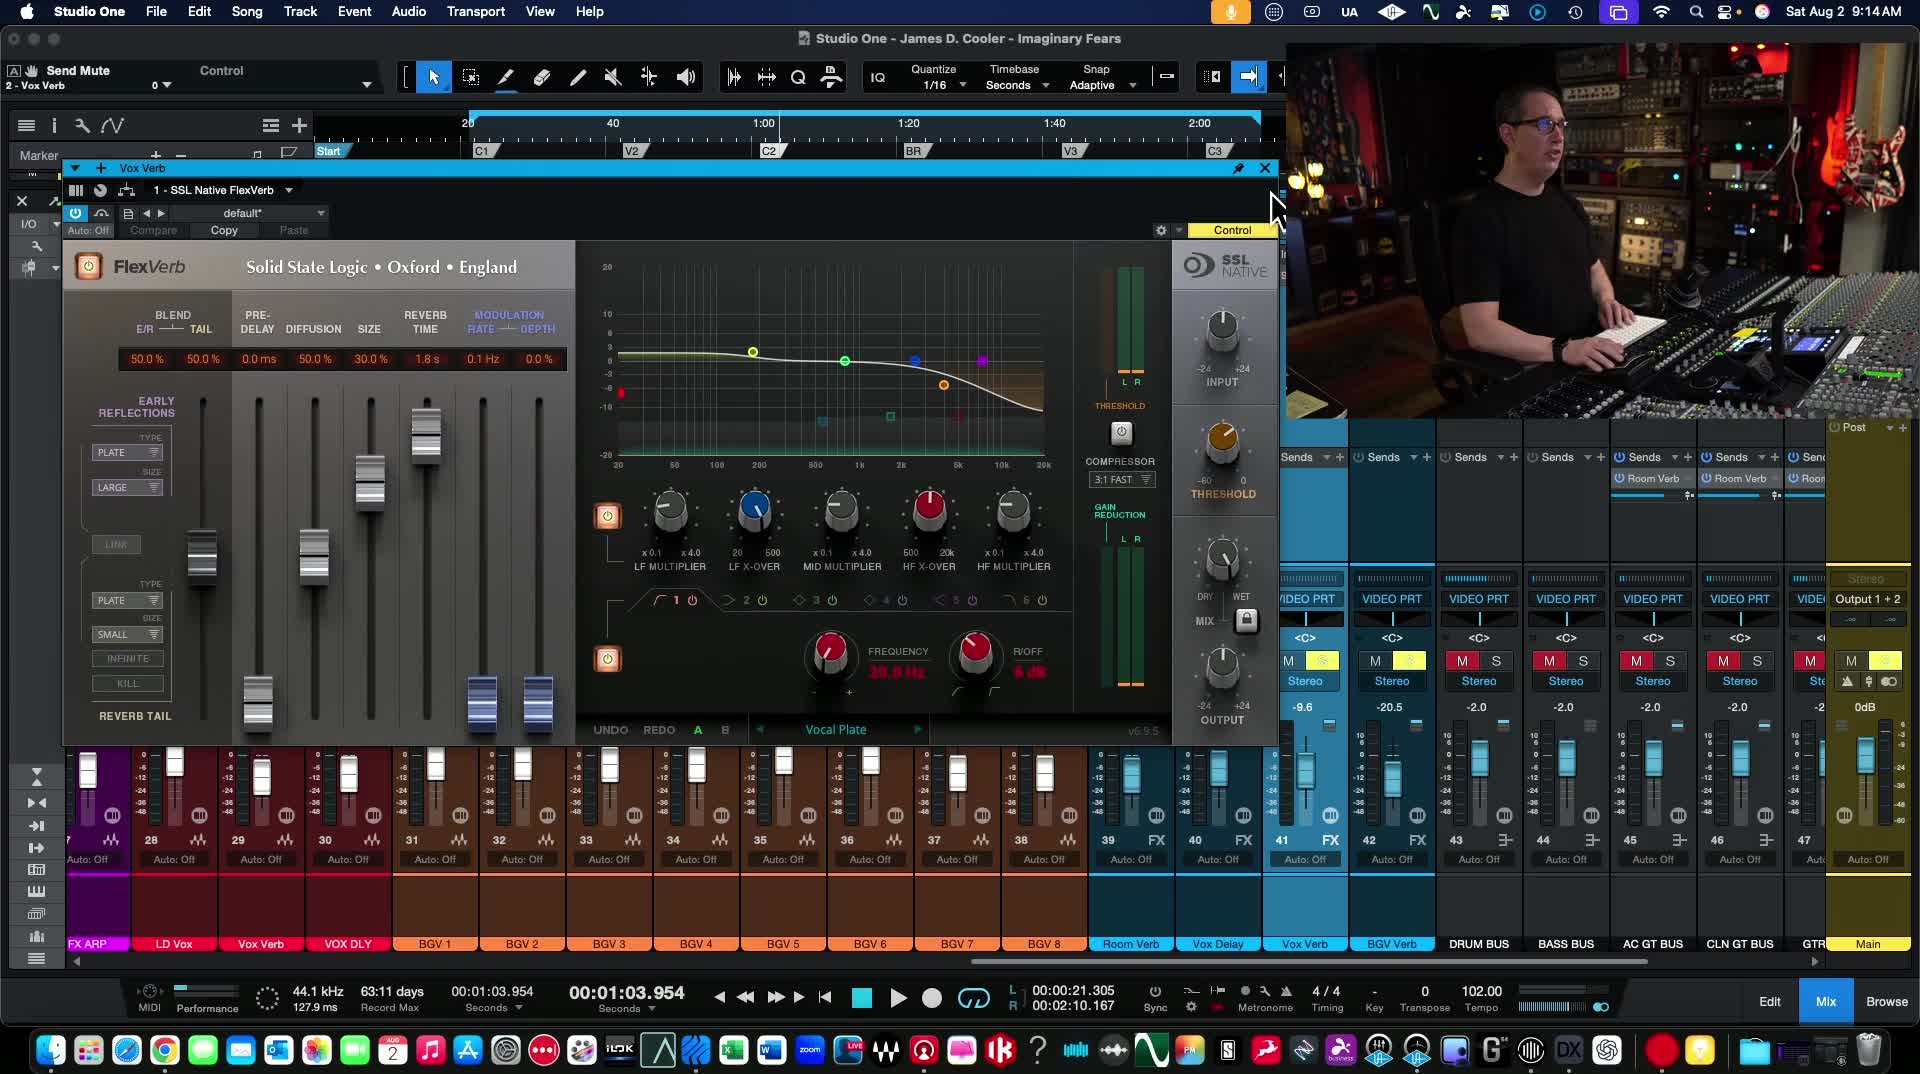
FlexVerb Quick Tour
"Not my favorite reverb in the world, but it’s got a lot of control. Along the left you can balance early reflections and the reverb tail, pick room types, control pre-delay, diffusion, room size, reverb time. There’s even a built-in EQ and compression section—lots to tweak!"
Caption: SSL FlexVerb main controls – the balance between early reflections and the tail, pre-delay, and room type options.
What Does It Sound Like?
Solo’d drums, with just the room reverb added:
“Just a nice live drum room sound. You gotta play with this plugin to get it right, but it’s flexible.”
-
Early Reflections/Room Tail: Adjustable blend for realistic space
-
Compression: Tightens up the reverb tail, if needed
-
EQ: Carve out mud or control brightness
Step 2: Instrument Reverb Routing
Instead of using a different reverb for every group, I sent all instruments (except bass) to the same room reverb. This way, everything feels like it’s in the same space:
-
Acoustic Guitars – Sent via group/bus
-
Electric Guitars/Cleans – Also via bus (to keep it easy)
-
Use the send levels on the bus to dial in how much reverb each section gets
Pro Tip: In Studio One, flipping the faders to send level (hit 'F'!) helps visualize and control send levels fast.
Caption: Send levels on the Studio One mix window—see at a glance who’s getting the most reverb.
“I’m putting the drums and all the guitars in the same room just to give everything a lively, realistic vibe, instead of everyone living in their own separate space.”
Adding Depth: Instruments and Bus Sends
Let’s solo out the main sections and A/B with and without the room reverb.
Guitars
-
Acoustic: Subtle room—just enough to make them sit back
-
Clean Electrics: Short, tight verb (don’t let it wash out)
-
Distorted Guitars: Even less reverb—let their natural density speak
When you blend it all and mute the reverb bus, the difference is subtle but major in the mix context.
“It just adds a sense of depth without washing everything out. That’s what I’m after—depth and glue, not a swamp!”
Caption: Before and after FX – the mix feels wider, deeper, and more cohesive.
What NOT to Do
Don’t have a separate huge reverb for every element; unless you’re going for a creative effect, it can blur the stereo image. By using a common room, everything gels.
-
If you like more separation, use different send levels, not different reverbs for everything.
-
Only skip bass and pre-effected elements (pads, synths with built-in verb).
Vocal FX: Delays and Reverbs that Shine
Vocals are the star, right? So FX here really matter.
Lead Vocal: Delay and Plate Reverb
-
Delay: SSL X-Echo (Tape delay)
-
Chose a tape head preset, tweaked feedback/mix
-
Used mostly a single tape head, but you can go multi-tap for crazy stuff
-
Low feedback (~40-50%), 100% wet
-
Listen in solo:
“It’s subtle—a little bit goes a long way. Too much feedback and it starts clouding up.”
-
Reverb: Another FlexVerb (Vocal Plate)
-
Chose a vocal plate preset and adjusted parameters:
-
Early Reflections/Tail: 50/50
-
Size: About 30%
-
Decay: Around 2 seconds
-
-
Gives the vocal that "sit in the track" energy and a sense of air around the words.
“It’s not my favorite combo in the world, but it does the job—it sits right, lifts the lead, but doesn’t swim.”
Caption: SSL X-Echo for tape delay on vocals, and FlexVerb set up as a lush plate.
Background Vocals
Kept it simple—background vocal bus feeding another plate reverb (FlexVerb Plate again, but tweaked differently).
“Just a touch to push them back in the space behind the lead.”
The Big A/B: With vs. Without FX
A/B-ing the entire mix with all reverb/delay bypassed shows you how much those fx add:
“With effects off, everything’s super up-front—it can be cool, but it lacks the 3D space. Once you put them back, the mix breathes.”
Caption: All FX plugins A/B’d – the true test!
Final A/B with Reference Tracks
Time to see how our final mix stands up to the producer’s reference.
Why Use a Reference?
Whenever you’re mixing, referencing a producer mix (even if it isn’t “final”) can quickly highlight what’s working, what isn’t, and what you may have missed.
How I Do It:
-
Play a section in both mixes (mine and the reference)
-
Listen for specific things—not everything at once!
-
Start with drums (kick, snare), then guitars, bass, vocals
-
Compare levels, FX, and panning
-
“In the producer mix, there’s more reverb and the drums are much thinner. My whole object is to try and do better.”
What Stands Out in the Reference
-
Reverb: LOTS more in the producer’s mix
-
Drums: Thinner, more distant (maybe too much reverb)
-
Low End: I prefer our beefier, more up-front drums
-
Guitars: Producer’s heavy guitars are much louder, especially in the chorus
-
Panning: Producer’s big heavies are panned more left, ours are wider and even
Caption: Reference track vs. your mix—look for differences in energy, space, and frequency balance.
Making Adjustments Based on The Reference
Here’s where compromise can happen. For example:
-
If the producer wants booming guitars, try edging those up in your fader rides
-
Use the same reverb send and just push the drum send fader slightly if you want more room vibe
“We could turn up the room for the drums… but I like ours being a bit drier and more up-front.”
Adjustments, Tweaks, and Compromises
Mixing with references isn’t about copying—it’s about informed choices.
-
If your drums are fuller and punchier, that’s often a plus!
-
Heavy guitars too loud in the producer ref? Bump yours for the chorus, but don’t drown the vocal.
-
Is something way too panned or out of balance? Adjust for your taste.
“The whole track pops when the heavy guitars hit, but we don’t overpower the vocal—she’s still the star.”
EQ Curve A/B
Looking at the frequency analyzers, the curves are similar—mostly matching in subs and low-mids, a bit more top end in the producer mix.
Caption: Frequency spectrum of our mix vs. reference—see where the biggest differences lie.
Automation, Polish, and Extra Tips
We haven’t jumped into detailed automation in this series, but that would be the last pass:
-
Volume rides: Especially on background vocals, to push/pull as needed in different sections
-
Effects automation: Pull reverb/delay down for the bridge or up for the last chorus
If you want a full-length deep-dive just on automation, just shout in the comments—I’m happy to make that happen.
“This is where you can really find the gold: finessing levels, drying out the bridge, making the chorus explode. Don’t skip it!”
Takeaways: Is the SSL Native Bundle Worth It?
A little wrap up—after a full song, every last bit mixed using only SSL Native (aside from Auto-Align on drums):
What Rocked:
-
Channel strips: Absolutely fantastic—clean, punchy, analog vibe
-
Specialty plugins: Guitarstrip, Vocalstrip add character
-
Overall sound: Tight, pro, and musical
What Fell a Bit Short:
-
Reverb and Delay: Usable, but not my first choice. Decent after serious tweaking, but I wouldn't trade my usual go-tos just yet.
-
Presets: Not “dialed-in” out of the box—expect to spend time fine-tuning
“The moral? It’s not about what tools you use, it’s how you use them. The SSL Native bundle can take you all the way there—if you know how to bend it to your will!”
Caption: SSL Native Plugin bundle—you can mix an entire song and get great results with just these tools.
Freebies & Further Learning
Don't forget your freebie!
Before spending any money, I want you to go grab my FREE 90-minute beginner mixing course at HomeRecordingMadeEasy.com. Whether you’re brand new or already moving faders, you’ll get:
-
A complete start-to-finish song mix using nothing but stock plugins
-
Multitrack files to practice with
-
PDF guides and checklists
-
It’s all about “it’s not the tools, but how you use them!”
Already done the free course?
If you dig my teaching style and want to get deeper:
-
Mixing Made Easy Vol. 1: Start here if you’ve got a year or two of experience or less; simple tools, big results
-
Mixing Made Easy Vol. 2: Adds third-party plugins like SSL, UAD, and more
-
Volumes 3 & 4: Take it further as you grow
-
Mixing MasterClass & The Mixing Hybrid Courses: Advanced topics like working directly with client projects, automation, and using producer references in real-world client settings
Use coupon code YouTube25 for 25% off any course on the site!
“If you aren’t sure where to start, drop me an email at the website—I’m happy to point you to the best training for your level!”
Share Your Thoughts!
I hope you enjoyed this deep dive on mixing with SSL Native Plugins, and maybe more importantly, got some new ideas and techniques for your own tracks. If you want more of these series—maybe a deep-dive with Universal Audio or Fabfilter or another favorite—let me know in the comments below!
If you’re catching up, check the full 4-part YouTube playlist here and drop a like or a share if you found it useful.
Thanks for reading, thanks to James D. Cooler for letting us use "Imaginary Fears", and I’ll catch you in the next multi-part mixing adventure.
Keep making music, keep learning, and remember: it’s not about your plugins, it’s about your EARS.
“All these plugins are great, by every manufacturer. The moral is: it’s not the tools, it’s how you use them.”
See you in the next series!
Caption: The final mix window—faders set, FX in place, and ready for mastering!

