
Mixing Bass & Guitars with SSL Native Plugins: Part 2 Breakdown

Welcome back, everyone! If you’re following along, you already know we’re deep into the SSL Native Mix series, walking through the process of mixing a whole song, start to finish, with only SSL native plugins. If you missed the first part where we got those drums rockin’, the link is right here and in the description below. Today, we’re rolling up our sleeves and diving into part two, all about dialing in the bass, acoustic and clean guitars, and moving towards those crunchy electrics.
Whether you’re a bedroom producer, a mixing engineer looking to brush up on your SSL plugin skills, or just a home studio enthusiast trying to squeeze every ounce of tone from your tracks, stick around. This blog post is overflowing with hands-on tips, real-world decisions, audio philosophy, and screenshots galore for all the visual learners out there.
Table of Contents
Recap and Setup
If you’re new here or just need a reminder, here’s what this series is all about:
-
Mixing a full song from start to finish
-
Using ONLY SSL Native Plugins
-
Each instrument group gets its own dedicated part
In part one, we laid down the drum foundation using the SSL 4kG channel strip, auto-alignment, and of course, good old SSL bus compression and drum strip plugins. (Didn’t see it? Catch up here!)
Today’s Focus:
-
Bass
-
Clean Guitars
-
Acoustics
-
Electrics (if we have time!)
And we’re working on “His Imaginary Fears” by James D. Cooler (find his links here – big thanks to James for the awesome track).
Note: This is a multi-part series (4–5 parts), each building on the last. By the end, you’ll have a full song mix—SSL style.
SSS Drums: Quick Recap
Before leaving the drums behind entirely, let’s do a super fast recap.
The Drum Chain:
-
SSL 4kG Channel Strip on all drums
-
Auto Align (for phase correction)
-
SSL Bus Compressor on drum bus
-
SSL Drum Strip on master
-
SSL Fusion plugins on the mix bus, paired with the bus comp
“There’s no samples, triggers, or external replacements—just the original drum tracks polished up with SSL power.”
A/B Check: It’s All About Improvement
Making the source better, not different. Before & after clips show off the natural improvement these SSL tools bring. Push the drums until they sound punchy, snappy, and alive.
Taming the Bass with SSL 4kE
Now, let’s anchor the band—the bass guitar.
What We’re Working With
-
A single DI bass track.
-
No amp sim here (SSL Native plugins don’t have one right now), so we’re keeping it honest!
Listening to the Raw DI
What’s hitting our speakers is a decent DI; sweet highs, full lows, sits well by itself. Normally, I’d double it up and add an amp sim for extra growl, but not today. Let’s keep it SSL-native and see how fat we can get the groove.
Bass Processing: Step by Step
1. Resetting Presets
First, drop any weird leftover presets—start with a default state. Fresh ears, clean slate.
2. EQ Choices: Black Knob on 4kE
Personally, I love the Black EQ on this channel for bass. Adds a bit of edge and vibe.
-
Nudge those lows for warmth.
-
Tweak the top just a touch if it clatters.
3. Compression Settings
-
Ratio: 4:1
-
Attack: Fast (locks in transients)
-
Release: Medium-slow (lets the groove breathe)
-
VCA Fader: Give it some push, then pull back on output to maintain level (pro tip: don’t be scared to drive SSL faders—they’re modeled for tone!)
4. Into the Mix
“Unless we put it in the mix, who the hell cares, right?”
Preach! Always tweak in context.
Adding Warmth with Saturation
Let’s sprinkle a little magic on the low end.
-
SSL Saturator: Already on the mix bus, but adding more on the bass can bring out that tasty analog crunch.
Screenshot: SSL Saturator on bass aux bus
Listening back:
-
Adds gentle grind without getting fuzzy.
-
Makes that DI ‘pop’ in a busy mix.
-
Leaves plenty of high end; no need to double or re-amp this time.
Mixing Clean Guitars
Moving up the frequency spectrum, it’s time for the clean guitars.
The Setup
-
Two clean guitar tracks
-
Panned left and right
Let’s loop and focus on this layer—sculpting the stereo field, getting out of the way of vocals yet adding energy.
Channel Strip Processing
Each guitar gets its own SSL 4kE.
-
Preamp/Trim
-
Ease back if things get too “barky.”
-
Watch how hard you hit the pre.
-
-
Compression
-
Ratio: 4:1
-
Attack: Fast (smooths spiky playing)
-
Release: Medium-fast
-
-
EQ
-
Pull out just a hair at 2.5k if it sounds “poky”
-
Add where it’s dull (judgment call)
-
Shaping the Tone
“Don’t be afraid to push the console—SSLs sound great when you drive them a bit!”
-
Push the faders: More volume into the channel can give the plugins some flavor, then compensate with output to avoid overloading the bus.
-
Subtle Automation: Adjust as you go; dynamics are the secret sauce.
Layering Both Sides
-
Load up the same channel plugin settings, tweak if needed for each side.
-
Hard pan for maximum width (“Left and right, boom”).
-
Balance them in context.
Optional: Vintage Drive
-
Dropping the SSL Vintage Drive plugin on each clean guitar channel for just a touch of extra harmonic excitement (nothing drastic, but enough to melt the digital edge).
-
Subtle, but makes a difference when stacked.
Vintage Drive dialed in lightly on a clean guitar channel
Acoustic Guitars: Tips for a DI Challenge
Here’s where it gets interesting (and, for some, frustrating). You’ve got those acoustic tracks, but… they’re DI. No mics involved: just the raw pickup.
Problems with DI Acoustics:
-
Sound thin or plasticky
-
Lacking natural room or resonance
-
Sometimes “quacky” in the upper mids
But hey, sometimes you gotta work with what you have.
Processing Steps
1. Compression
-
4:1 Ratio
-
Fast attack/release for leveling and smoothing
-
Slap it hard if the performance is wild
2. High-Pass Filtering
-
Rolling off below 200Hz to clear mud and boominess
-
Keeps the low end available for bass and kick
3. Avoid Over-EQing
-
Don’t stress too much if the tone isn’t “Nashville perfect.” It’s blending in a mix under electrics and vocals—not starring solo.
4. Stereo Panning
-
Hard pan left/right
-
Create a platform for center elements (lead vocals, bass, snare)
“You just want these to blend in and add shimmer; don’t overthink DI flaws in a dense mix.”
Before and after waveforms of DI acoustic treatment
Electric Guitars & the SSL Guitar Strip
Here comes the fun part: distorted electrics—the backbone of any good rock mix.
The Tracks
-
Main electric guitars (left/right for choruses)
-
Additional parts for bridge, fills, and licks
SSL Channel Processing Choices
You get creative freedom here.
-
For basics: SSL 4kE or 9000 channel strips
-
For extra attitude: Fire up the SSL Guitar Strip
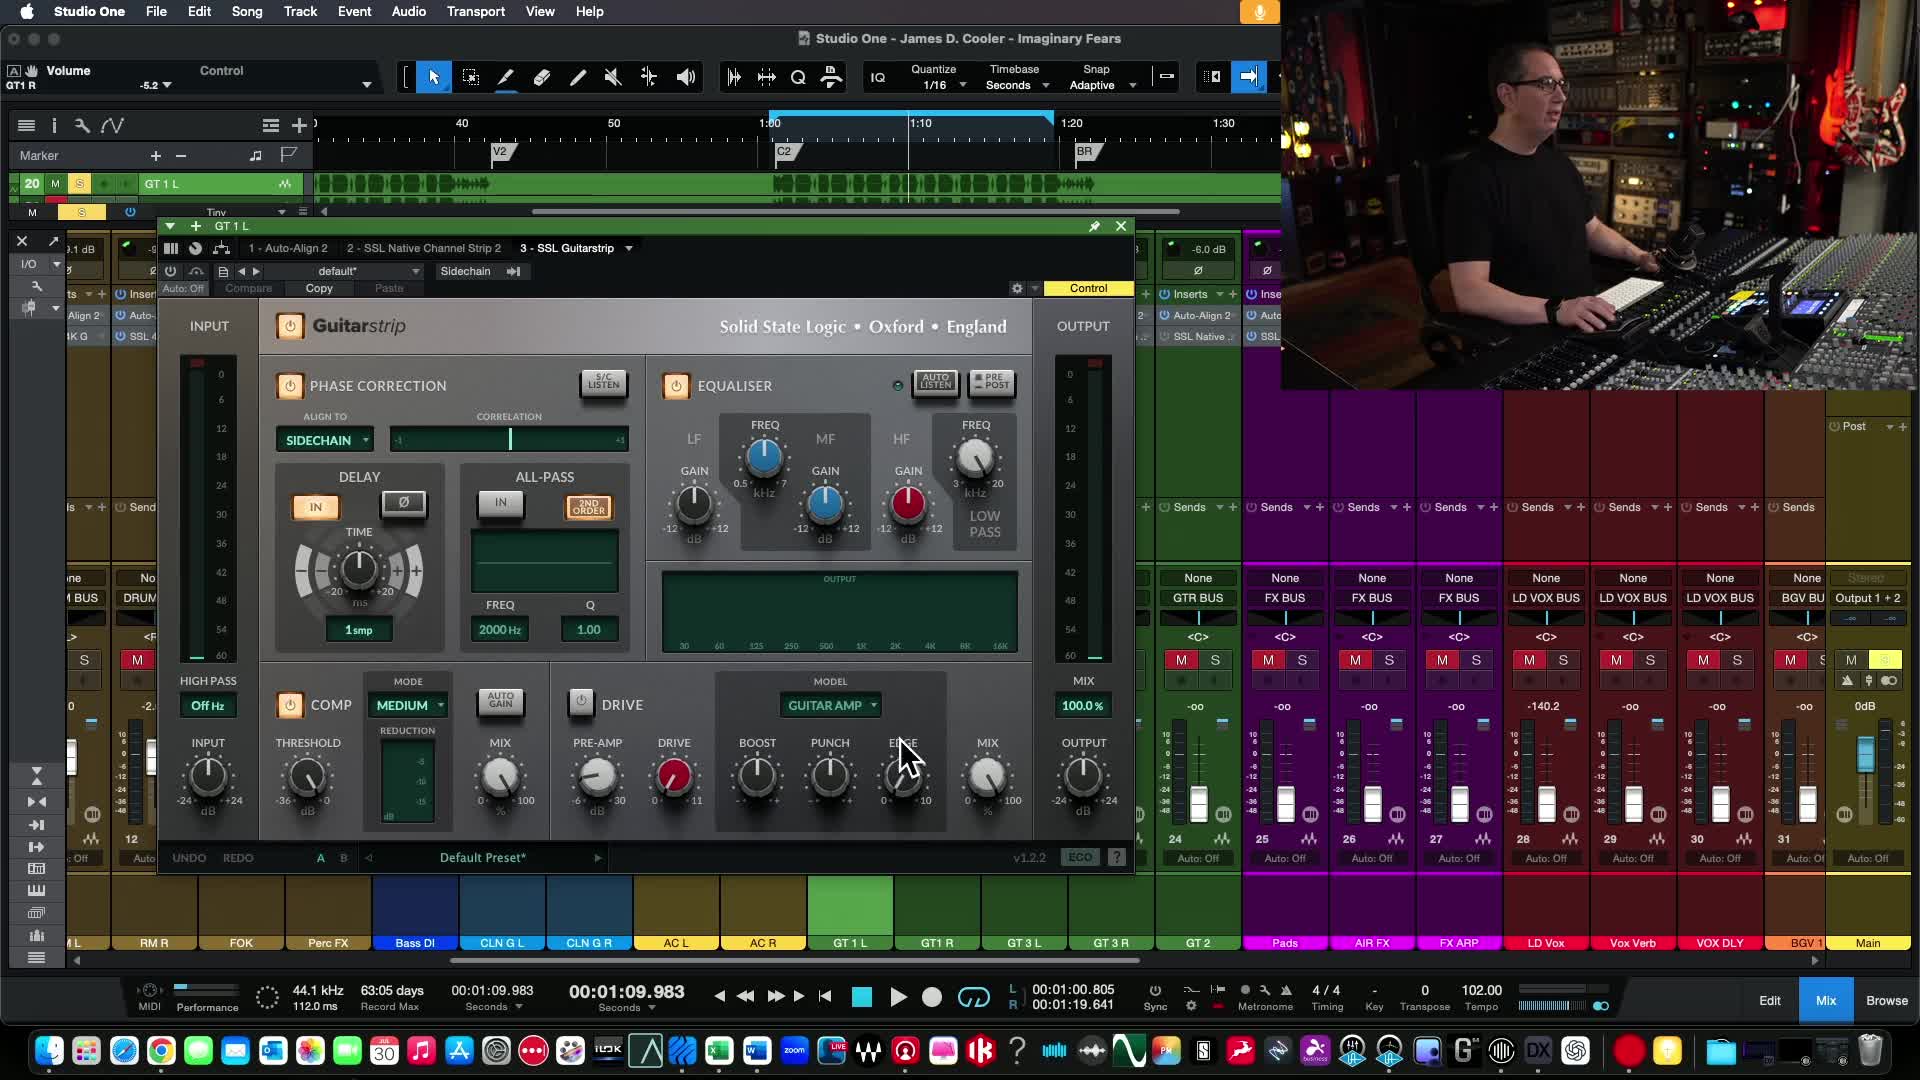
Exploring the Guitar Strip
This is a newer plugin in the SSL Native lineup, designed especially for guitar (and even bass). Here’s what’s onboard:
-
Amp modeling (!)
-
Preamp, Compressor, EQ
-
Delay
-
Fun presets (Spice Up My Riff, Beef It Up, Driving Riff, etc.)
Trying Presets
-
Load up a few presets and see what sticks (“Beef It Up” is, you guessed it, boomy. “Spice Up My Riff” = more edge.)
-
Turn the amp section on for room flavor, or bypass for more direct “console” tone.
SSL Guitar Strip plugin view with preset selector open
“I gotta tell you, I like it. It adds a lot of midrange. Just running it through does something cool.”
A/B Testing
-
Compare with and without the guitar strip enabled.
-
Listen for:
-
Enhanced midrange (“punch”)
-
Some built-in delay or space
-
Additional girth or sizzle
-
Layering and Balancing
-
Use similar but not identical settings left/right for variance
-
Pan and blend to taste (keep them a little louder than final just for clarity while tweaking)
-
Pull up additional rhythm/lead parts as the song arrangement progresses
-
Don’t be afraid to use simple channel strip plus low-cut for big “block” chord sections that don’t need sparkle.
Mixer routing for electric guitar stacks using SSL plugins
Mix Bus: Checking the Whole Picture
Every few moves, zoom out and listen to what’s happening on the full mix bus.
-
SSL Bus Compressor and Fusion plugins are working on the master.
-
Always keep in mind: “It’s not about how the instrument SOLO’D sounds; it’s about the MIX.”
“My one concern is that I feel like we have a little bit too much edge on all these guitars because everything is kind of top endy which is why you saw that I really didn’t boost a lot of top end on any of these things.”
A/B Testing: Before and After
Let’s get real—hearing is believing.
What changes do you notice after all the SSL love?
-
Guitars: More focused, slightly softer on the ragged edges, stacked wider with less boxiness
-
Bass: Fills out the low end without trampling the kick drum
-
Acoustics: Chime in the gaps, more balanced highs (without fizz), less mud
“It’s subtle, but it cleans things up and brings a little more focus.”
BA comparison: Raw tracks vs. SSL-processed full band section
What’s Next?
With most of our rhythm section and guitars locked in, here’s a sneak peek at what’s coming:
-
Part 3: Pads, effects, and more creative sweetening (reverbs/delays)
-
Final parts: Vocals processing, automation, and the master bus!
Stay tuned for the next entry in this series where we’ll dive into the glue that holds the band’s sound together, before bringing the vocals up to the front where they belong.
Final Thoughts
Working through this mix with just SSL Native plugins is a real testament to what a high-quality, focused toolkit can do for your workflow. You learn fast what each plugin brings, and you get to know the difference between “mixing in the box” and “mixing with analog flavor.”
Some Pro Tips and Takeaways:
-
Start from default—avoid preset traps.
-
Drive channel faders for SSL analog vibe.
-
Treat DI acoustics gently: high-pass, compress, blend.
-
Try ALL the plugins: Even if you don’t think a “guitar” plugin will help, experiment—happy accidents rule.
-
SUBTLE saturation and vintage drive plugins work wonders for gluing tracks.
-
A/B constantly—mix in context, not in solo.
“Trying to keep these videos somewhat manageable and not too long so you guys stay interested… Let me know in the comments below if you like this style of video, this little series!”
Get Even Deeper
Love this workflow? Want to see it in longer form or with more detailed breakdowns, including other iconic plugin brands?
-
Check out my full course, Mixing with Analog Style Plugins Made Easy
-
Go deeper than these YouTube sessions
-
Features SSL Native plus other analog-style plugins
-
25% off with code
YOUTUBE25—Course link here
-
You’ll learn:
-
Mixing philosophy and mindset
-
Plugin signal chains
-
Workflow hacks for fast, pro mixes
And if you want a quick win for free, swing by Home Recording Made Easy and grab that totally free mixing course for beginners—look for it right on the homepage.
Join the Conversation
I want to hear from you:
-
What other plugin brands should I cover next?
-
Do you have SSL Native workflow tips or favorite presets of your own?
-
Which part of the mix process are you struggling with?
Drop your comments below, and don’t forget:
-
Like, share, and subscribe for daily parts in this SSL mixing journey!
This is Dave from Home Recording Made Easy, signing off. Thanks for reading, and get ready for Part 3 where we keep pushing this mix forward!
See you in the next part!

