
Make Quick Decisions Using Black Salt Audio Telos Drums and Telos Bass Mixing Presets

What's included in this session breakdown?
You'll see the exact preset-based workflow used to mix a full drum kit and bass, kick, snare, overheads, room mics, toms, and bass DI and amp, in one sitting!
This all only uses Black Salt Audio's Telos Drums, Telos Bass, and CR-1 plugins, plus the one thing every drum preset gets wrong that you need to fix by ear.
Below, we break down FOUR real decisions made track by track, explain why they worked, and show how to apply the same logic to your own session!
So don't worry if you do not own a single Black Salt Audio plugin; this concept can be applied anywhere!
This session comes straight from a video David filmed for the Home Recording Made Easy YouTube channel, mixing real multi-tracks from Liza Colby's blues-rock tune "My World."
Navigate to the video's description if you want to follow along and mix the song yourself, as the free multi-tracks are available to download! Or click here to download!
Table of Contents
- Getting a Fast, Punchy Kick Sound With Drum Mixing Presets
- Why Drum Presets Run Compression Hot (and How to Dial Snare Compression Back)
- Blending Bass DI and Amp Tracks for a Bigger Low End
- Adding Punch With a Parallel Drum Bus (the NYC Compression Trick)
- What Worked, and What to Watch For
- FAQ
- Quick Recap
Getting a Fast, Punchy Kick Sound With Drum Mixing Presets
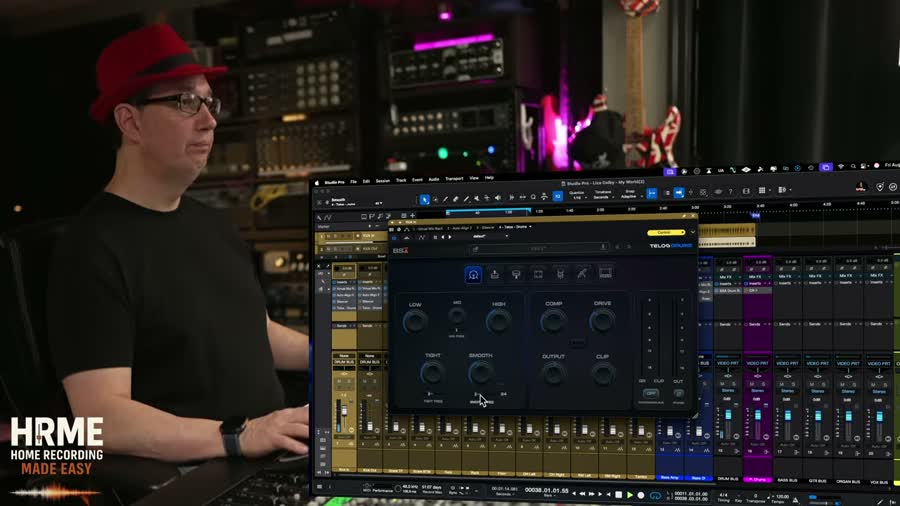
The fastest way to get a usable kick sound in a mix is to start from a genre-matched preset on a purpose-built drum channel plugin, then trust your ears over chasing individual EQ bands.
Before touching a single knob, the session was gain-staged with the Slate Digital Trimmer and phase-aligned with Auto-Align, so every fader started at a sane, comparable level.
Every other plugin, including Telos Drums, sat in bypass until it was that track's turn.
"So, we're going to use kick drum. Let's just start with some presets and let's just see how close we can get with presets."
Kick In: Starting From a Factory Preset
On the kick-in mic, the first factory preset loaded in Telos Drums, the single-plugin channel strip that combines EQ, compression, saturation, clipping, and tone shaping in one window, got most of the way there without any manual adjustment.
"That's a nice kick sound for a kick in."
Don't be mistaken! Presets are not a finished product.
However, a well-designed preset gets you close to a finished product quickly, so you can spend your limited mixing time on the decisions that actually separate an average mix from a great one.
Try This In Your Own Mix
Before you touch a single EQ band on a kick track, load the closest genre-matched preset your plugin offers and listen to it in context with the rest of the kit for at least one full verse before deciding what, if anything, needs to change.
Kick Out: Confirming It Holds Up Without the Plugins
After dialing in the kick-out mic the same way, the processing got A/B tested by bypassing both Telos instances entirely.
"Okay, that's pretty good. If we bypass these two Telos, here's what we have. We turn them off... Good enough for blues rock, right?"
That kind of on/off comparison is worth building into every session.
If a plugin isn't audibly improving the track when you toggle it, it's not doing its job, no matter how good the preset name sounds.
Why Drum Presets Run Compression Hot (and How to Dial Snare Compression Back)
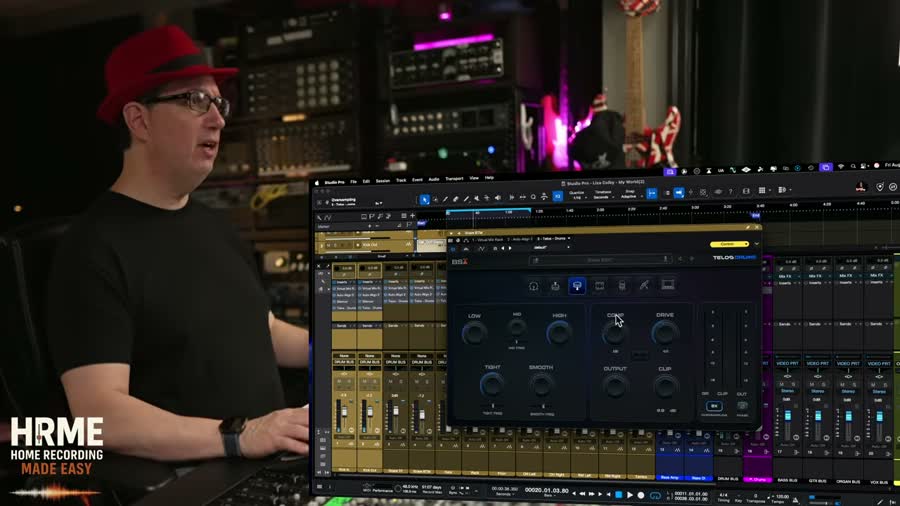
Most factory drum presets are voiced for a demo reel, not your mix, and the first place that shows up is compression that's dialed in far more aggressively than a track actually needs sitting next to nine other channels.
On the snare-top mic, that became obvious almost immediately after loading a preset in Telos Drums.
"So I noticed that they put a lot of compression on with the presets. So you could just dial it back. So this is a good way to just start."
This is the single most useful habit in this entire session. A preset that sounds over-squashed soloed in headphones isn't necessarily wrong; it's just a starting point that assumes you'll ride the COMP and DRIVE controls back down once you hear it against the rest of the kit.
Treating "the preset sounds too aggressive" as a reason to abandon it, rather than a reason to turn one knob, is where a lot of home studio mixes lose time.
Try This In Your Own Mix
The next time a drum preset sounds over-compressed the moment you load it, don't switch presets.
Pull the compression amount back by roughly a third and listen again in the full mix before judging it.
Blending Bass DI and Amp Tracks for a Bigger Low End
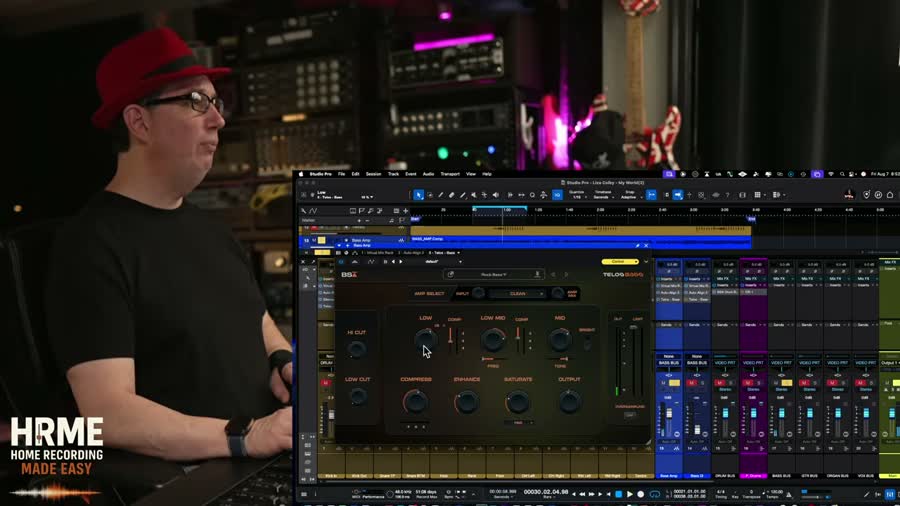
When a bass part is recorded as both a DI signal and a mic'd amp, the mixing decision isn't choosing one over the other; it's deciding which track owns the low end.
With this session's bass amp and bass DI tracks both run through Telos Bass, that split was made deliberately rather than by accident.
"Going to let the bass amp do not so much of the low end. Let the DI do..."
A mic'd bass amp captures cabinet character, grit, and upper harmonics, but its low end is shaped by room and mic placement in ways that can get boomy or inconsistent.
A DI signal skips all of that and delivers a clean, full-range low end you can shape predictably.
Rather than letting both tracks fight over the same 80 to 200 Hz range, the amp track got trimmed back down low while the DI carried more of the foundation.
"Now we'll let the bass DI do most of the low end here."
The same logic applies to blending a DI and reamped signal on guitar: you're not picking a winner, you're combining two sources so each one only has to do the part it's actually good at.
Try This In Your Own Mix
If you tracked bass with both a DI and an amp mic, try high-passing the amp track around 150 to 200 Hz and letting the DI carry the low end underneath it, instead of running both tracks full-range and fighting phase and mud later.
If you want to go deeper on signal-flow decisions like this one, The Mixing Academy walks through a new set of multi-tracks like this every month with live coaching on exactly these calls.
Adding Punch With a Parallel Drum Bus (the NYC Compression Trick)
Parallel compression, sometimes called the NYC drum trick, blends a heavily crushed copy of your drums underneath the dry, dynamic kit so you get extra punch and weight without squashing the transients you already dialed in.
This session had a bus already built and waiting for exactly that.
Setting Up the "P Drums" Send
"We have a parallel drum compression that we can do. And we have this drum crush thing... So, let's send our direct mics there. Let's send this over to P Drums. And we will do this pre-fader and we will hit it zero dB."
Two details matter here. The send was set pre-fader, meaning it taps the signal before the channel fader, so riding the kick or snare fader later doesn't change how hard the parallel bus gets driven.
And it was set to unity gain, zero dB, rather than an arbitrary send level, so the parallel bus receives exactly what the direct mics are putting out, no more and no less.
Only the kick and snare direct mics were routed there, the source of a track's punch, not the ambience mics.
Dialing In the CR-1 Crush
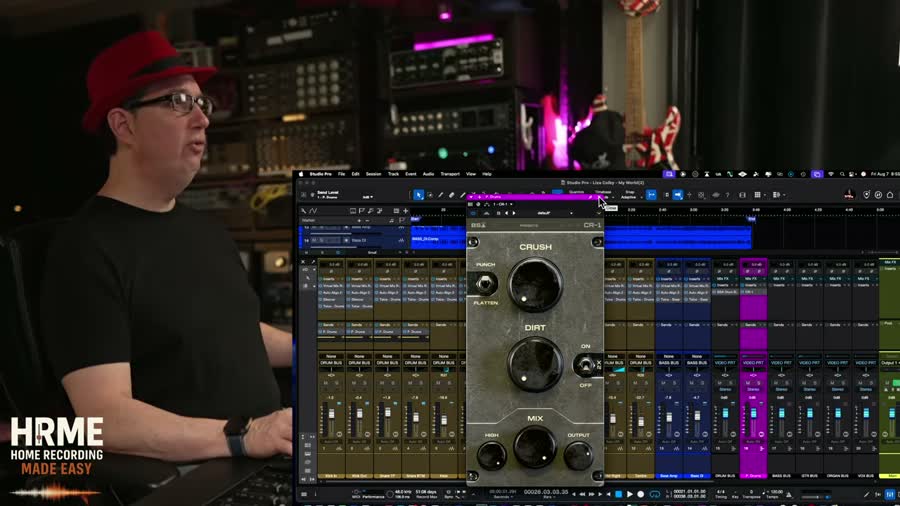
The parallel bus itself runs Black Salt Audio's CR-1, a dedicated crush and distortion plugin with Crush, Dirt, and Mix controls built specifically for this kind of aggressive parallel drum processing.
"Let's do kick snare. Let's see what that does... Wow, that's pretty cool."
The point of a plugin like CR-1 on a parallel bus isn't subtlety; it's meant to be pushed hard, because the dry kit underneath is still carrying the actual dynamics and detail.
The crushed bus just gets blended in at a level where it adds weight without becoming audible as its own separate sound.
Try This In Your Own Mix
Build an aux bus, send your kick and snare to it pre-fader at 0 dB, and load any fast, characterful compressor or saturator you already own.
Push it far more aggressively than you'd ever dare on the main drum bus, then bring the aux fader up slowly until you feel more weight and energy without being able to point to what changed.
What Worked, and What to Watch For
What Worked
- Starting every one of ten-plus tracks from a genre-matched preset got a usable rough mix built in a single sitting, without a single manual EQ move.
- Bypassing the Telos plugins on the kick to A/B the raw tracks confirmed the processing was actually earning its place rather than just sounding different.
- Splitting low-end duties between the bass DI and amp avoided the boomy, undefined low end that comes from two full-range low-end sources fighting each other.
- The pre-fader, unity-gain send into the parallel drum bus meant the CR-1 crush stayed consistent no matter how the dry faders got adjusted afterward.
What to Watch For
- Factory presets are a starting point tuned for a specific genre and source; a blues-rock kit needed the compression pulled back, and a different genre or a brighter-sounding room will likely need a different adjustment, not the same one.
- A parallel crush bus is easy to overdo. If you can identify the crushed signal as its own distinct sound in the mix rather than as "more weight," it's probably too loud.
- This session skipped straight to processing because gain staging and phase alignment were already handled with the Slate Digital Trimmer and Auto-Align first. Skipping that step and going straight to presets on an ungated, unaligned session won't get the same result.
FAQ
1) Do Black Salt Audio's Telos Drums presets work for genres other than rock?
In this session, the factory presets got a blues-rock kit most of the way there in seconds, but they still needed the compression pulled back once the track was heard against the rest of the kit. Treat any preset, on any genre, the same way: load it, listen in context, and adjust from there instead of assuming it's mix-ready as-is.
2) What is the NYC parallel compression trick, and do I need Black Salt Audio's CR-1 to do it?
The NYC trick blends a heavily compressed or crushed copy of your drums underneath the dry kit for extra punch without losing the original dynamics. CR-1 was the specific plugin used in this session, but the technique itself just needs a fast, characterful compressor or saturator on a pre-fader aux send, so any plugin you already own that can be pushed hard will work the same way.
3) Should I blend a bass DI and bass amp track, or just pick one?
If you recorded both, blending them usually beats picking one. Let the DI carry the clean, full-range low end and let the mic'd amp contribute grit and character higher up, rather than running both full-range and letting them compete for the same low frequencies.
4) Why use a pre-fader send at 0 dB for a parallel drum bus instead of post-fader?
A pre-fader send taps the signal before it hits the channel fader, so the parallel bus keeps receiving a consistent signal no matter how you ride the kick or snare fader later in the mix. Setting it to exactly 0 dB, unity gain, means the parallel bus gets exactly what the direct mic is putting out, which makes the crushed signal predictable to dial in.
5) I don't use Studio One or own any Black Salt Audio plugins. Can I still use this workflow?
Yes. Every technique here is principle-based: start from a preset and adjust by ear, pull back compression that's too aggressive, split low-end duties between DI and amp bass tracks, and build a pre-fader parallel bus for extra punch. Every major DAW supports pre-fader sends, and any well-designed channel strip or compressor plugin can stand in for the ones shown here.
6) Where can I get the same multi-tracks used in this session?
The "My World" multi-tracks by Liza Colby used throughout this session are free to download here, so you can practice this exact workflow on the same audio.
Quick Recap
- Start every drum and bass track from a genre-matched preset, then adjust by ear instead of chasing individual EQ bands from scratch.
- Expect factory compression to run hot. Pull back the COMP or DRIVE control before deciding a preset isn't working.
- Split low-end duties between a bass DI and bass amp track instead of letting both carry the same frequencies.
- Build a pre-fader, unity-gain parallel drum bus and push a crush or saturation plugin hard on it for extra weight without losing the dry kit's dynamics.
Final Thoughts
This was part one of a two-part session, drums and bass here, with guitars, organs, and vocals coming in part two. What stands out watching it back is how little time was spent on any single knob.
The presets did the heavy lifting, the ears did the judgment calls, and the whole kit and bass got mixed in one sitting.
If you've been stuck second-guessing every EQ move on your own drum tracks, that's the real takeaway: start from something close, then only fix what's actually broken.
Ready to Mix Like This Yourself?
Get a new set of real multi-tracks every month and mix along step-by-step, with live coaching calls and personal feedback on your own mixes.
Useful Links
- Watch the full session: Mixing with Black Salt Audio (Part 1)
- Download the free "My World" multi-tracks
- The Mixing Academy
- Related: Hands-On with Black Salt Audio Telos Drums
- Related: Advanced Mixing Techniques for Enhancing Your Snare Drum
- Related: Fender Studio Pro 8: How I Reamp Guitars for a Thicker Mix
Every setting shown here reflects one real-time decision made mixing this specific session. Treat it as a fast starting point for your own ears, not a preset recipe to copy blindly; your source tracks, room, and genre may call for a different approach.

